- St. Olaf Libraries
- Research Guides
- St. Olaf Equipment Tutorials
- Sony a7S III Mirrorless Camera w/ 24-70mm f/2.8 Lens Kit
St. Olaf Equipment Tutorials
Guides for the equipment available for checkout at St. Olaf College.
LibKey Nomad

Librarian

Sony a7S III Mirrorless Camera w/24-70mm f/2.8 Lens Kit
|
Sony a7 III Mirrorless Camera and Lens:
|
Rode Microphone with Windshield:
|
|
80 GB CFexpress SD Card:
|
Lexar CF-A/SD Card Reader:
|
|
Lens Hood:
|
Sony NP-FV 100 Battery: |
|
Sony Battery Charger with Power Cable
|
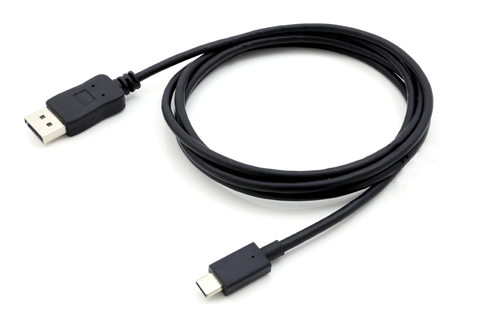
USB-A to USB-C Cable:
|
|
Lens Caps: |


Getting Started:
- To turn on, flip the switch on the top right corner of the camera. Make sure the white line lines up with ‘ON’
- If camera screen is off but the camera is still set on “ON”, half press the shutter button to wake it up
- If you would like to use the lens hood, line up the white dash with the words “IN” and “OUT” on the hood with the lens. Rotate the hood counterclockwise until there is a click and the two white lines are lined up.
- For easy storing, the hood can be placed backwards, following the same counterclockwise direction until a click is heard.
- To remove the lens hood, simply press and hold the black button located on the right side of the lens hood (or on top of the hood if placed backwards) and rotate clockwise.
- To mute the camera (or turn off the beeping noises), press the “MENU” button, located on the top left, scroll down to “SETUP”, the one with a yellow suitcase icon, scroll down to number 9 “SOUND OPTIONS” and select “AUDIO SIGNALS”.
Beginner Tip:
- If the settings and different ways to change the images and colors are confusing consider shooting in auto mode, colored green and has “AUTO” printed on it. This allows the camera to automatically change the aperture, shutter speed and the iso so you can just go out and take photos without having to worry about any of the settings. Make sure the lens is set to auto focus. This can be done by looking on the left side of the lens and insuring that the switch is on “AF”
- “AF” is for auto focus while “MF” is for manual focus
Camera Modes:
(to change camera modes, be sure to press and hold the button on top od the dials or else the dial will not rotate)
- (Auto) The camera will automatically change the aperture, shutter speed, and iso.(M)
- (1,2,3) — allows you access custom settings from the camera memory settings.
- (S&Q) — Use for shooting slow or fast motion video
- Can adjust the mode of it by clicking the the first square on the top left corner of the screen. (Ex. can do S&Q Manual mode, or S&Q Shuttter Priority Mode, ect.)
- (Film) — Use for video shooting
- Manual Mode — will give you the most control of the camera. In this mode, the wheel on the front of the camera below the power switch will control aperture, and the unlabeled control wheel on top of the camera will control shutter speed.
- The aperture is how much light is allowed into the lens. The higher the aperture, the more light is allowed in, the lower the aperture, the less light is allowed in. With a high aperture, you can achieve a blurred background. Whereas with a low aperture, everything in an image is clear.
- (S) Shutter Priority Mode — the numbered wheel on the camera’s right side will change exposure compensation.
- The shutter speed is the only thing that can be adjusted using either dials (front or unlabeled). The aperture and iso will adjust accordingly on its own.
- (A) Aperture Priority Mode — the numbered wheel on the camera’s right side will change exposure compensation.
- The aperture is the only thing that can be adjusted using either dials (front or unlabeled). The shutter speed and iso adjust accordingly on its own.
- (P) Program Mode — allows you to adjust the shutter and the aperture, and the opposite setting will compensate to maintain the correct light level. For instance if you change aperture, your shutter speed will change to compensate and vice versa.
Buttons:
- Power Switch Button — Press the button down halfway to focus, and all the way to take a photo. If the camera falls asleep, depress the button halfway to wake it back up.
- Exposure compensation dial — Pressing the lock button at the center switches the exposure compensation dial between the locked and unlocked status. The dial is unlocked when the lock button is popped up and the white line is visible.
- C1 button — Will allow you to change white balance settings, which start on auto
- C2 button — Will allow you to change different focusing clusters
- C3 Button — Press to quickly access the focus menu and change the focus of the camera by turning the ring at the end of the lens to get the desired focus you want.
- C4 Button — turns on and off the touch operations on the screen.
- AF-ON — Allows you to grab and hold focus settings as long as you hold down the button. In video, you can also use it to push and pull focus while filming.
- For viewing, it functions as an enlarge button
- AEL button — Allows you to check the ISO when shooting in Manual mode (stars it)
- Fn button — Allows you to have quick access to the camera’s most important settings
- Joystick above FN Button — can be used to navigate menus and change settings easily. By pressing and holding it, it allows you to focus on the object located right in front of the camera
- DISP — Pressing DISP will allow you to cycle through the camera’s different home display screens.
- Viewfinder dial — This small dial allows you to change the focus of the viewfinder if you are near or far sighted so you can operate it without your glasses.
Microphone Set-Up:
- To install the microphone, make sure the bottom, black, circular base is screwed all the way to the top. This can be achieved by unscrewing the base counterclockwise.
- There should be a gap in between the circular base and the square base.
- Slide the square base onto the square opening located on top of the camera’s viewfinder. Secure the camera on by twisting the circular base clockwise.
- Make sure the microphone is secure enough that it doesn’t move but not too tight where it can damage the camera
- On the left side of the camera, there should be 3 flaps. Open the smaller on on the top. This is the microphone jack (it should be a red circle). Plug in the microphone. The built-in microphone will automatically turn off and the microphone that has just been connected will pick up the audio.
Resources
Helpguide: https://helpguide.sony.net/ilc/2010/v1/en/contents/TP0003229264.html
Camera Manual: https://www.sony.com/electronics/support/res/manuals/5060/9efaad11e6676fa16753b3353987ece7/50604671M.pdf
Lens Manual: https://www.sony.com/electronics/support/res/manuals/5032/f19e117c843f4943ea63a08fd3b3eb4e/50328820M.pdf