- St. Olaf Libraries
- Research Guides
- St. Olaf Equipment Tutorials
- Manfrotto MVH502AH Fluid Head Tripod
St. Olaf Equipment Tutorials
LibKey Nomad

Librarian

Manfrotto MVH502AH Fluid Head Tripod
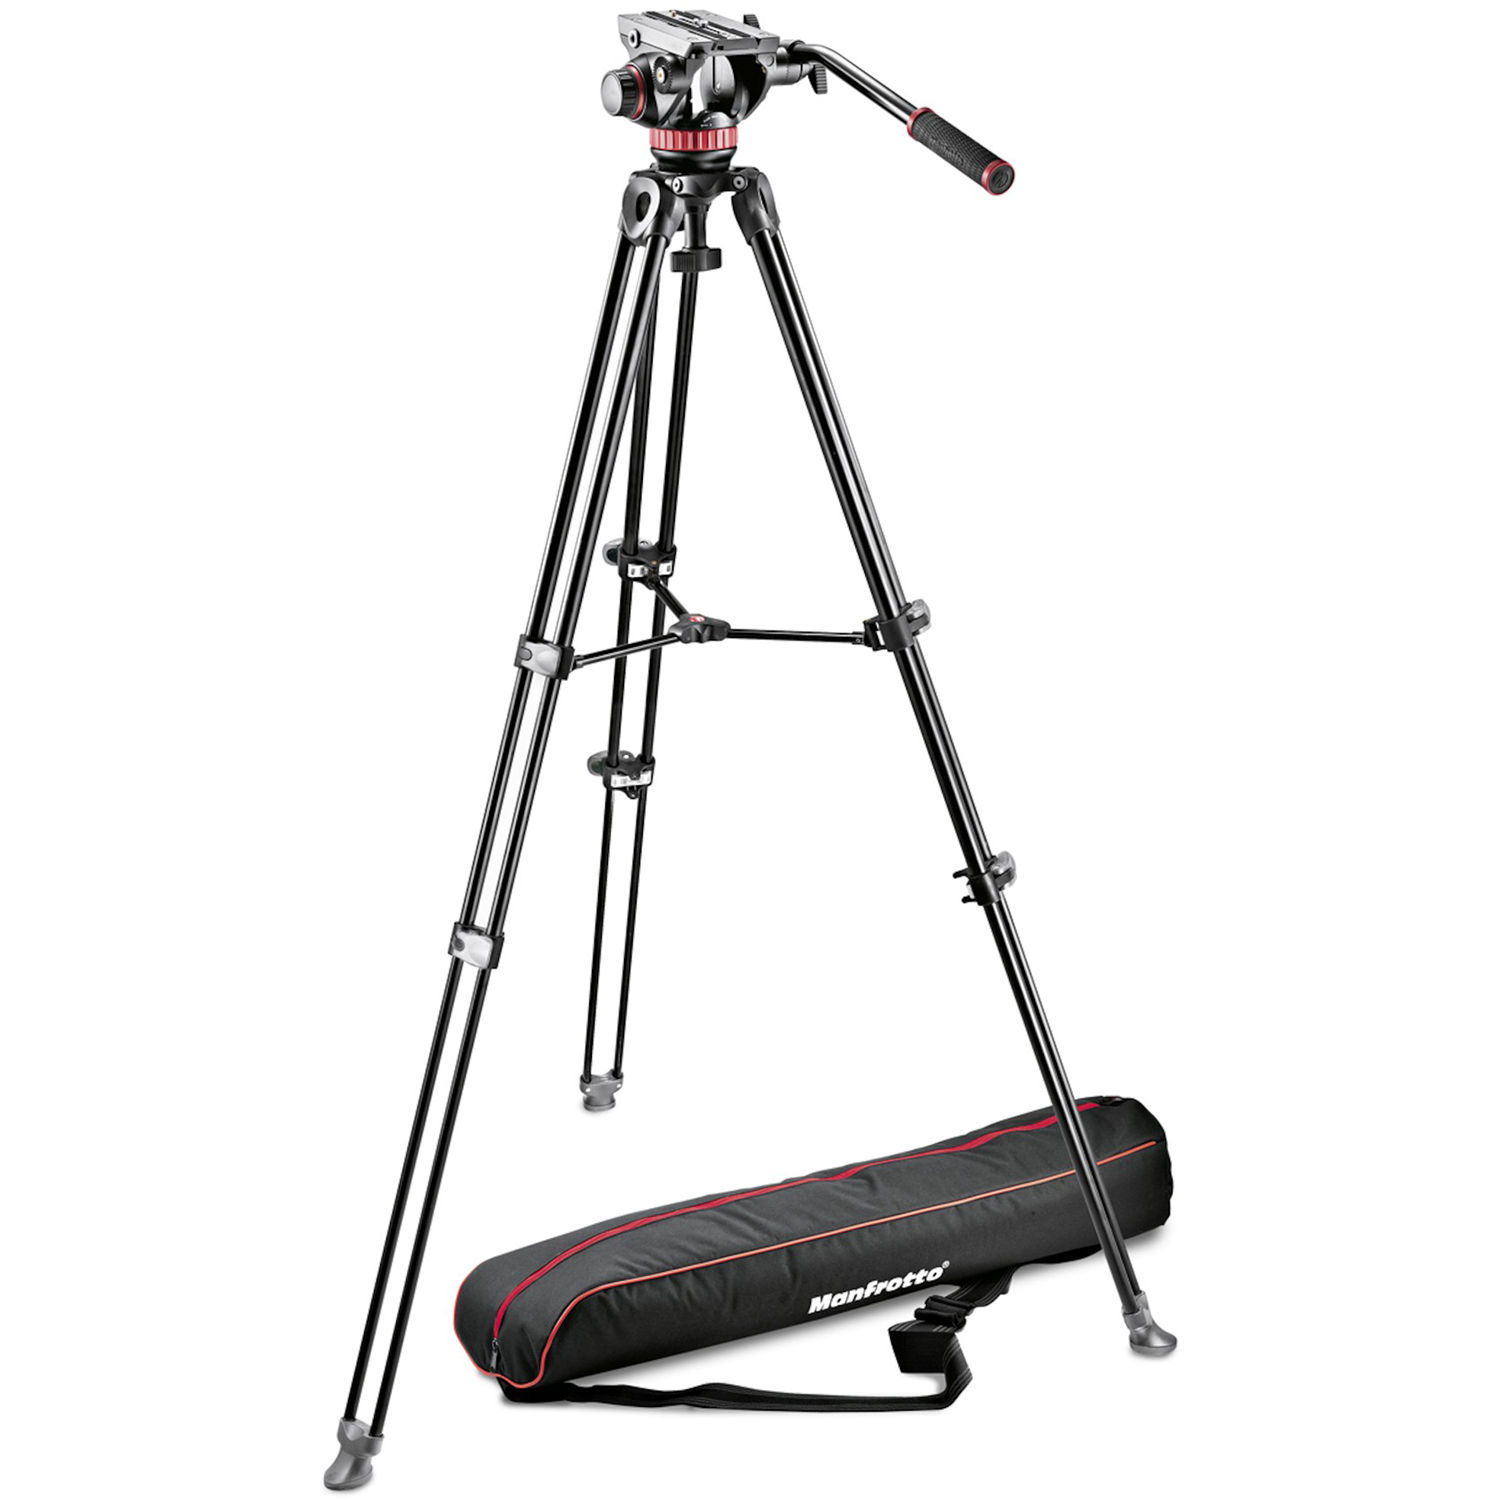
Description:
“The Manfrotto MVT502AM is a lightweight video tripod. Its telescopic twin-leg structure is made with elliptical aluminum tubes that help reduce torsion, and it includes a fixed mid-level spreader for increased rigidity and faster set-up. High-grip rubber feet are perfect for giving a steady and firm basis on all surfaces. The 2-stage/3-section MVT502AM has a 75mm bowl (with 60mm adapter) for compatibility with all professional 75mm/60mm half-ball video heads. This versatile tripod is quick, simple and smooth to set up thanks, in part, to the quick release leg locking collars.”
Ideal for camcorder and HDSLR cameras supplied with external accessories
Setting up tripod:
- Unzip bag and undo velcro strap then pull the tripod out of the bag
- Pull the legs apart. Set it on the floor and press the inner triangle to ensure that the legs are fully spread out
- To adjust height, pull gray outer leavers located towards the bottom of the legs. Then, slide the legs fully out. Lock the leavers back into place by pushing them back into position. Press down on inner triangle again to ensure the legs remained fully spread out
- *Doing top to bottom is recommended*
Taking down the Tripod:
- Pull gray levers out if height is adjusted
- Pull inner triangle up towards the top of the tripod to pull all the legs back in
- Push tripod down to slide all legs back into place
- Place tripod back into the bag, securing the velcro strip, and zip closed
Adding the camera:
- Remove the plate from the tripod head
- To do this, unscrew knob located on the top right. Once it is loose, push the button located on the back left labeled with an ‘R’. This should release the plate.
- Screw on camera with the silver screw
- Make sure it is tight enough so it won’t move but not too tight that it accidentally damages the camera.
- Be sure to check the underside of the plate to ensure the lens is on the right side. Lens should point towards the golden button
- Slide the plate back into the fluid head until click can be heard. (Pressing the release button can help with this.) Adjust the tightness of the beginning knob as desired. The camera should now be secured onto the tripod.
Removing the camera:
- Remove the plate from the tripod head
- Unscrew the silver screw, holding the camera to avoid dropping it
- Screw will not fall out of the plate
- Slide plate back into place
Pan, Tilt, and Additional Information:
- Pan:
- To pan, move the handle from side to side.
- To create a smoother, slower pan, rotate the red disk located at the bottom of the head clockwise, towards the positive (+) side.
- To create a faster pan, rotate the red disk counter clockwise, towards the negative (-) side.
- To lock into position, twist the knob located in between the base and the plate of the head clockwise. To loosen, turn the knob counter clockwise.
- To pan, move the handle from side to side.
- Tilt:
- To loosen tilt, loosen the circular knob located right in front of the handle.
- Move handle up and down to desired position
- Once the handle is released, the head will shift back to its original position!
- For a smoother, slower release, turn the knob on the left hand side labeled ‘Fluid Drag System’ towards the positive (+) side.
- For a faster, more aggressive release, turn the knob to the negative (-) side.
- To keep the camera in position, retighten the circular knob located in front of the handle. To lock it, rotate clockwise all the way
- Stabilizer:
- Leveling Bubble can be located under the head of the tripod. To ensure the tripod is stable, make sure the bubble is within the circle. If this is not the case, adjust the legs and make sure they are fully stretched out
Resources:
- Tripod Manual:
- https://cdn.manfrotto.com/media/downloadable/manual/instruction-MT055CXPRO3-MT055CXPRO4-MT055XPRO3-MT190CXPRO3-MT190CXPRO4-MT190XPRO3-MT190XPRO4.pdf
- *English instructions located on page 2*
- Fluid Head Manual:
- https://cdn.manfrotto.com/media/downloadable/manual/instructions_Manfrotto_MVH502A-MVH502AH_GB.pdf
- *English instructions located on page 6*
- Tripod Website:
- https://www.manfrotto.com/us-en/video-tripod-aluminium-telescopic-twin-leg-mvt502am/
- Head Website:
- https://www.manfrotto.com/us-en/502-fluid-video-head-with-flat-base-mvh502ah/